The RV Maintenance Checklist That Could Save You Thousands
A comprehensive RV maintenance checklist for new owners, organized around the failures that cause the most expensive damage when neglected. Built around what actually matters.
When you buy an RV, no one really tells you what's about to need attention.
The dealer hands you a thick owner's manual you'll never finish reading. The previous owner, if you bought used, gives you a folder of receipts with question marks where service records should be. And the internet is full of contradictory maintenance checklists that try to cover every possible scenario, leaving you more confused than when you started.
We've been there. We bought our first RV and quickly realized there was a lot we didn't know. Worse, we didn't know what we didn't know. The maintenance items we'd never heard of were exactly the ones that ended up causing trouble.
This guide is what we wish someone had handed us on day one. Whether you drive a motorhome or tow a travel trailer, fifth wheel, or camper, the house-system failures that cost the most money are consistent across rig types.
Instead of overwhelming you with every conceivable task, we focused on the maintenance items that cause the most expensive damage when ignored. Get these right, and you've handled the items most likely to actually save you money over time. We'll start with the highest-impact items and then walk through additional tasks that round out a complete maintenance picture.
How to use this guide
Each item below includes what it is and why it matters, what it can cost if you ignore it, how often to check or service it, warning signs to watch for, and how to handle it yourself or when to call a pro.
If you're brand new to RV ownership, don't try to absorb all of this in one sitting. Bookmark this page, work through the first section thoroughly, then come back when you're ready for more. The checklist covers the same ground regardless of rig type; the house systems here apply whether you're in a motorhome, pulling a travel trailer or fifth wheel, or camping in any other rig.
If you're coming out of winter storage, the spring shakedown trip is the single best way to actively test the systems below before your first real trip of the season. The complete trip checklist covers what to verify on departure day and at the campsite, trip after trip. A printable PDF version is available to keep in the rig.
The highest-impact maintenance areas
These are the maintenance areas that hit the highest percentage of RV owners and cause the most expensive damage when missed. If you only focus on a handful of things in your first year of ownership, focus on these.
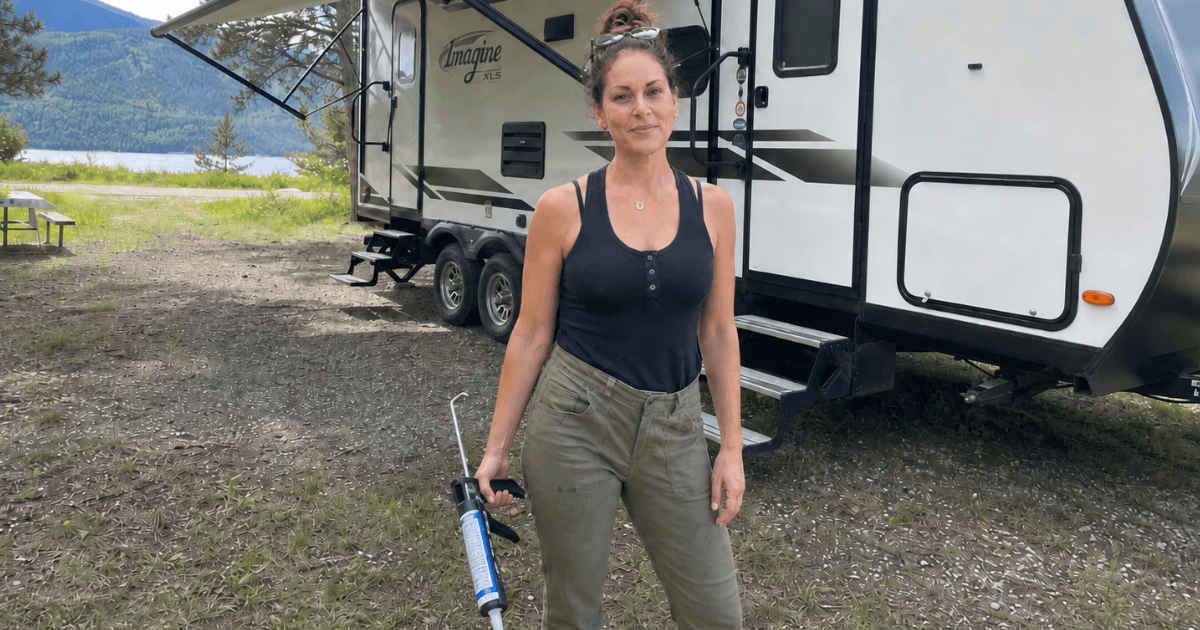
1. Your roof
Water damage is the number one killer of RVs. Not collisions, not engine failure, not anything else. Water finds its way in through failed roof seals and cascades into damage that compounds quickly. Soft floors, rotted walls, ruined cabinetry, mold, and electrical problems all start with a roof that wasn't watched.
The frustrating part is that roof failures are usually invisible until they're expensive. A pinhole in a sealant joint can leak for months before you notice anything inside the RV. By the time you see a water stain on the ceiling, the damage underneath the surface is often substantial.
What it can cost: A minor reseal job costs $200 to $500. Water damage that has gone unaddressed for a season can run $5,000 to $20,000 in cascading repairs, depending on what got soaked.
How often: Inspect twice a year minimum, ideally in spring before the camping season and in fall before storage. Many full-time RVers inspect quarterly. Reseal as needed, typically every 1 to 3 years for the most exposed areas.
Warning signs: Cracked, peeling, or yellowed sealant around vents, antennas, AC units, and seams. Any soft spots when you walk on the roof. Water stains on the interior ceiling, which means damage is already underway.
How to handle it: Most owners can do their own roof inspections. You're looking at the condition of the sealant around every penetration and along every seam. Anything that looks cracked, separating, or chalky needs attention. Resealing is also within reach for most owners using self-leveling lap sealant designed for your roof type. For full roof reseals or any significant repair, call a pro.
RVKeeper's Essentials Plan tracks your roof inspection schedule automatically, so you never have to wonder if it's been too long.
2. Your tires
RV tires age out before they wear out. This is the single most important thing new owners need to understand about their tires, and it catches almost everyone by surprise.
Unlike car tires, which usually fail because the tread wears down, RV tires fail because the rubber degrades over time. Heat, sunlight, and the simple passage of time break down the rubber compound from the inside. A tire with plenty of tread can still blow at highway speed if it's old enough. Most tire manufacturers recommend replacement at 5 to 7 years, regardless of how the tread looks.
A tire blowout on an RV isn't like a car blowout. The shredded tire can rip off body panels, damage the wheel well, take out brake lines, and pull the rig off the road. The repair bill from a single blowout regularly exceeds the cost of replacing all your tires.
What it can cost: A single new RV tire runs $200 to $500 installed. A blowout with body damage can run $1,000 to $5,000 or more. A blowout that causes an accident can run into the tens of thousands.
How often: Check tire pressure before every trip, ideally with a tire pressure monitoring system that watches them continuously while driving. Inspect for cracks, bulges, and uneven wear monthly. Check the date code on each tire annually. Replace at 5 to 7 years of age, even if tread looks fine.
Warning signs: Cracks in the sidewall, especially the small ones that look like dried mud. Bulges anywhere on the tire. Uneven tread wear. Pressure that drops faster than the other tires. Any tire over 7 years old, period.
How to handle it: Pressure checks and visual inspections are easy DIY tasks. Reading the date code, which is four digits indicating week and year of manufacture and found on the sidewall, is a five-minute lesson. Replacement should be done by a tire shop, ideally one experienced with RVs.
RVKeeper's Essentials Plan tracks tire age and inspection schedules, so you'll know when each tire is approaching the replacement window before it becomes a problem.
3. Your electrical system
The electrical system in an RV is more complex than most new owners realize. There's the 120-volt shore power system that runs your AC, outlets, and major appliances. There's the 12-volt house battery system that runs your interior lights, water pump, propane detector, and fridge controls when you're not plugged in. There's often a converter or inverter bridging the two. On newer rigs, there may be solar charging, lithium batteries with battery management systems, or generator integration.
When electrical problems happen, they range from inconvenient (lights flickering, fridge not cooling on 12-volt) to dangerous (electrical fires). The expensive failures tend to come from neglected connections, undersized batteries, or charging systems running out of spec. If your AC is running but not cooling, that's typically a separate diagnostic. Our RV air conditioner troubleshooting guide walks through the most common causes by symptom. When lights dim, outlets go dead, or the 12V system stops working while shore power is on, our RV electrical problems guide covers how to isolate each symptom by system. If the refrigerator isn't cooling, the RV refrigerator troubleshooting guide covers both absorption and compressor units and the failure modes most common in each.
What it can cost: A blown converter runs $300 to $800. A premature battery replacement, whether from undercharging or overcharging, runs $200 to $1,500 depending on whether you're on lead-acid or lithium. An electrical fire from a corroded connection can be catastrophic.
How often: Inspect battery terminals and connections monthly. Check battery water levels monthly if you have flooded lead-acid batteries. Test the converter output annually. Check shore power cord and connections before every trip. Have the electrical system professionally inspected annually if you do a lot of dry camping or have a complex setup.
Warning signs: Lights that flicker when appliances cycle. Hot spots on the shore power cord or pedestal connection. Visible corrosion on battery terminals. A converter that runs constantly or makes unusual sounds. Any burning smell, ever.
How to handle it: Battery terminal cleaning, water topping, and visual inspections are DIY tasks. Anything involving the converter, inverter, or 120-volt wiring should be done by an RV technician or qualified electrician. The 120-volt side can kill you if you don't know what you're doing.
RVKeeper's Essentials Plan tracks your electrical inspection schedule and reminds you to check connections before trips and at regular intervals.
4. Your toilet and waste system
This isn't the glamorous part of RV ownership, but neglecting the toilet and black tank system causes problems that range from annoying to expensive. Clogged tanks are bad enough. Damaged seals, broken valves, and sensor failures get worse from there.
The black tank in particular requires understanding. It's not like a residential toilet. Solids need adequate water to break down. Tank treatments help control odors and break down waste. The flush mechanism has seals that dry out and fail. The valves at the dump connection wear and stick. The vent stack on the roof needs to stay clear for proper operation.
What it can cost: A blocked black tank can require professional cleaning at $200 to $500. Replacing a failed dump valve runs $200 to $400. A leak from a failed seal can cause hidden floor damage that runs into the thousands. An overflowing tank inside the RV is a nightmare you don't want to imagine.
How often: Flush the black tank thoroughly after every trip. Inspect seals annually. Test the dump valves quarterly when not in use, to keep them from sticking. Clean the tank sensors annually, or as needed when they start reading inaccurately.
Warning signs: Sensors that always read full or empty. Odors that persist after dumping. A dump valve that won't fully open or close. Slow drainage. Any moisture or staining around the toilet base.
How to handle it: Regular cleaning and flushing are DIY tasks every RVer learns quickly. Seal replacement and valve replacement are within reach for moderately handy owners. Major tank repairs usually need a pro.
RVKeeper's Essentials Plan tracks your toilet and waste system maintenance schedule, including the items that are easy to forget between trips.
5. Safety systems
Beyond the four major systems above, there's a fifth area worth taking seriously: the safety-related items spread across your rig. Propane leak detection, smoke and carbon monoxide detectors, fire extinguisher condition, breakaway switch for towed rigs, escape window operation, and basic emergency preparedness.
These items often get attention once when the RV is new and then never again. The detectors don't get tested. The fire extinguisher's pressure gauge slowly drops below the green zone. The propane detector's batteries die. The breakaway switch corrodes from road salt.
What it can cost: Most of these items are cheap to maintain, perhaps $20 to $100 per year in batteries, replacement detectors, and minor parts. The cost of getting it wrong, however, includes losing your RV to a fire, or worse.
How often: Test smoke and CO detectors monthly. Check fire extinguisher pressure monthly. Test the propane detector annually and replace batteries. Verify the breakaway switch operates correctly before each trip if you're towing. Replace detectors every 5 to 10 years; they have expiration dates printed on them, which surprises most owners.
Warning signs: A detector that chirps intermittently, indicating low battery or end of life. A fire extinguisher pressure gauge outside the green zone. A breakaway switch that doesn't trip when tested.
How to handle it: All of this is DIY. The hardest part is remembering to do it, which is exactly the problem RVKeeper exists to solve.
RVKeeper's Essentials Plan tracks all of your safety-related maintenance, including detector replacement dates and inspection intervals.
Additional maintenance items worth tracking
The five items above cover the highest-impact areas. Once you have those under control, the following items round out a complete maintenance picture. They matter, but they tend to be either less common, less catastrophic when missed, or things you can reasonably handle with annual professional service. Motorhome owners should note that this list covers house systems only; engine, chassis, and drivetrain maintenance follows your chassis manufacturer's separate service schedule and is not covered here.
Slide-out maintenance
If your RV has slides, they need regular attention. Lubrication of the slide mechanism keeps motors and gears working smoothly. Inspection of the slide seals catches problems before water gets in (this is how you avoid a rotted floor down the line). Alignment matters too; a slide that's binding will eventually fail.
Lube the slide mechanism quarterly. Inspect seals monthly. Watch for slides that are slow to operate, make new sounds, or don't seal properly when closed.
Wheel bearings
The bearings inside your wheel hubs need to be repacked with grease annually or every 12,000 miles, whichever comes first. A failed bearing can cause a wheel to come off your rig, which is as bad as it sounds. The repack itself is relatively cheap, around $200, and absolutely worth doing on schedule.
If you're handy, this is a DIY job with the right tools and a service manual. If you're not, find an RV service center or mobile RV tech.
Brake system
RV brakes work harder than car brakes because of the weight involved. Drum brakes (common on travel trailers) need annual inspection and adjustment. Disc brakes (more common on larger rigs) need pad inspection annually. Either way, ignoring brake maintenance can leave you with brakes that don't perform when you need them most, and major brake repairs run $300 to $3,000 depending on what's involved.
Water heater anode rod
If your water heater is a Suburban brand (with a tank made of steel), it has an anode rod that sacrifices itself to protect the tank from corrosion. Replace it annually. If you don't, the tank will eventually corrode and require full replacement at $800 to $1,500. Atwood and Dometic water heaters have aluminum tanks and don't use an anode rod, so check which brand you have.
Plumbing winterization
If you store your RV in a climate that freezes, proper winterization is non-negotiable. Burst pipes from incomplete winterization run $1,000 to $5,000 in repairs and leave the RV unusable until fixed. The process involves draining the water system and either blowing it out with compressed air or filling it with RV antifreeze. Most owners learn to do this themselves after one season.
Generator maintenance
If your RV has an onboard generator, it needs regular service measured in run hours, not calendar time. Oil changes every 100 to 150 hours of run time. Air and fuel filter changes annually or every 200 hours. Periodic exercise (running the generator for 30 minutes or so) to keep the fuel system clear. Carbon buildup from neglect can lead to expensive rebuilds at $1,500 to $3,000.
Propane system
Propane is safe when handled correctly and catastrophic when not. The system should be leak-tested annually. The regulator should be replaced every 10 to 15 years. Tank certifications expire and need recertification every 12 years (you'll see this on the tank collar). Most of this work requires a certified propane technician, not because it's hard, but because doing it wrong creates serious safety risks.
What this all adds up to
Taken together, the items above represent the bulk of the upkeep your RV needs to stay healthy. None of it is particularly hard. The challenge isn't the work itself, it's keeping track of when each item was last done, what's due next, and which items apply to your specific rig.
That's why we built RVKeeper.
The Essentials Plan tracks the maintenance items most likely to cause expensive damage if neglected. It customizes the list to your specific RV type, so you're not looking at irrelevant items, and it stays free forever. We won't spam you, and we won't sell your information.
If you want help going further, RVKeeper also handles the additional items listed above and more. But you don't have to start there. Most new owners find that getting the basics right is more than enough to feel confident about their RV.
The point isn't to turn upkeep into a full-time job. The point is to stop carrying all of this in your head, so you can spend less time worrying about what you might be forgetting and more time enjoying the RV you worked so hard to get.
Your rig is a keeper. Treat it like one.
Ready to set up your free Essentials account? Download RVKeeper and let us handle the tracking, so you can handle the trips.
RVKeeper
Track every item on this checklist
RVKeeper turns this checklist into a live maintenance schedule for your specific rig, with service intervals for roof seals, water pump tests, LP regulator checks, battery voltage, and tire condition. Log what you've done, get reminded when something is due, and always know where you stand. The Essentials Plan is free forever and covers the 5 components most likely to cause expensive damage if neglected.
Download RVKeeper
Personalized maintenance tracking built around your specific rig.
Frequently asked questions
What are the most important RV maintenance items to focus on first?
Focus on the five highest-impact areas first: the roof, the tires, the electrical system, the toilet and waste system, and the safety systems. These hit the highest share of owners and cause the most expensive damage when neglected. Getting these right handles most of what actually saves money over time.
How often should I inspect my RV roof?
Inspect the roof at least twice a year, ideally in spring before the season and in fall before storage, and many full-time owners check quarterly. You are looking at the sealant around every penetration and seam for cracking, peeling, or chalkiness. A minor reseal costs a few hundred dollars, while unaddressed water damage can run many thousands.
When do RV tires need to be replaced?
RV tires age out before they wear out, so most manufacturers recommend replacement at 5 to 7 years regardless of how much tread is left. Heat, sunlight, and time break down the rubber from the inside, and a tire with good tread can still blow at highway speed if it is old enough. Check the four-digit date code on each sidewall annually.
Does my RV water heater need an anode rod replaced?
It depends on the brand. Suburban water heaters have steel tanks with a sacrificial anode rod that should be replaced annually, or the tank will eventually corrode and need full replacement. Atwood and Dometic water heaters have aluminum tanks and do not use an anode rod, so check which brand you have before adding it to your list.
How often should I service my RV wheel bearings?
Wheel bearings should be repacked with fresh grease annually or every 12,000 miles, whichever comes first. A failed bearing can cause a wheel to come off the rig, so this is worth doing on schedule. The repack itself is relatively inexpensive at around $200.
What maintenance does my RV need that the warranty will not cover?
Several routine items are classified as maintenance rather than defects and are your responsibility from day one, including roof and exterior sealant, tires, batteries, wheel bearing repacks, water heater anode rods, and brake service. These are not covered regardless of the unit's age. Neglecting them costs real money or creates safety risks, so track them on their own intervals.
How do I know which maintenance tasks actually apply to my specific rig?
The tasks that apply depend on your exact components, such as whether you have a Suburban or Atwood water heater, electric or hydraulic slides, or an onboard generator. The challenge is less the work itself and more tracking what was last done and what is due for your specific hardware. Documenting your components once lets you build a schedule that matches your rig instead of a generic list.